Overview
In this section, we will go over the steps of a cross-chain product integration. For example, the current work undergoing are,
- LP reward auto-compound with MangataX DEX. A video demo of the product can be viewed here.
- dApp staking auto-compound for Shiden Network
In both products, Turing Network provides partners with Automation-as-a-service that comes with several technical benefits including
- Oracle for time and price; Time is intrinsic to the chain and price is retrieved from aggregators such as DIA.
- Task Storage
- Task Invocation
- On/off valve for each user
Integration Workflow
1. Define the product
1.1 Design questions
Our partner conversation usually starts with a few questions,
-
Who are the target audience, or beneficial end users of this product?
For example, the audience of Shiden <> Turing integration is all users on Shiden Network.
-
What would be our product offering?
Taking Dapp staking as an example, the feature would automate two operations, claim and deposit.
Another example would be DEX liquidity pool reward compound, which will include three operations, claim, swap, and deposit.
-
What are the user defined inputs?
For auto-compound, normally the UI will need to ask users to provide some preferences, such as: - Frequency: how often to compound - Amount: percentage of claimed reward to compound (No need since the current re-deposit ratio is always 100%)
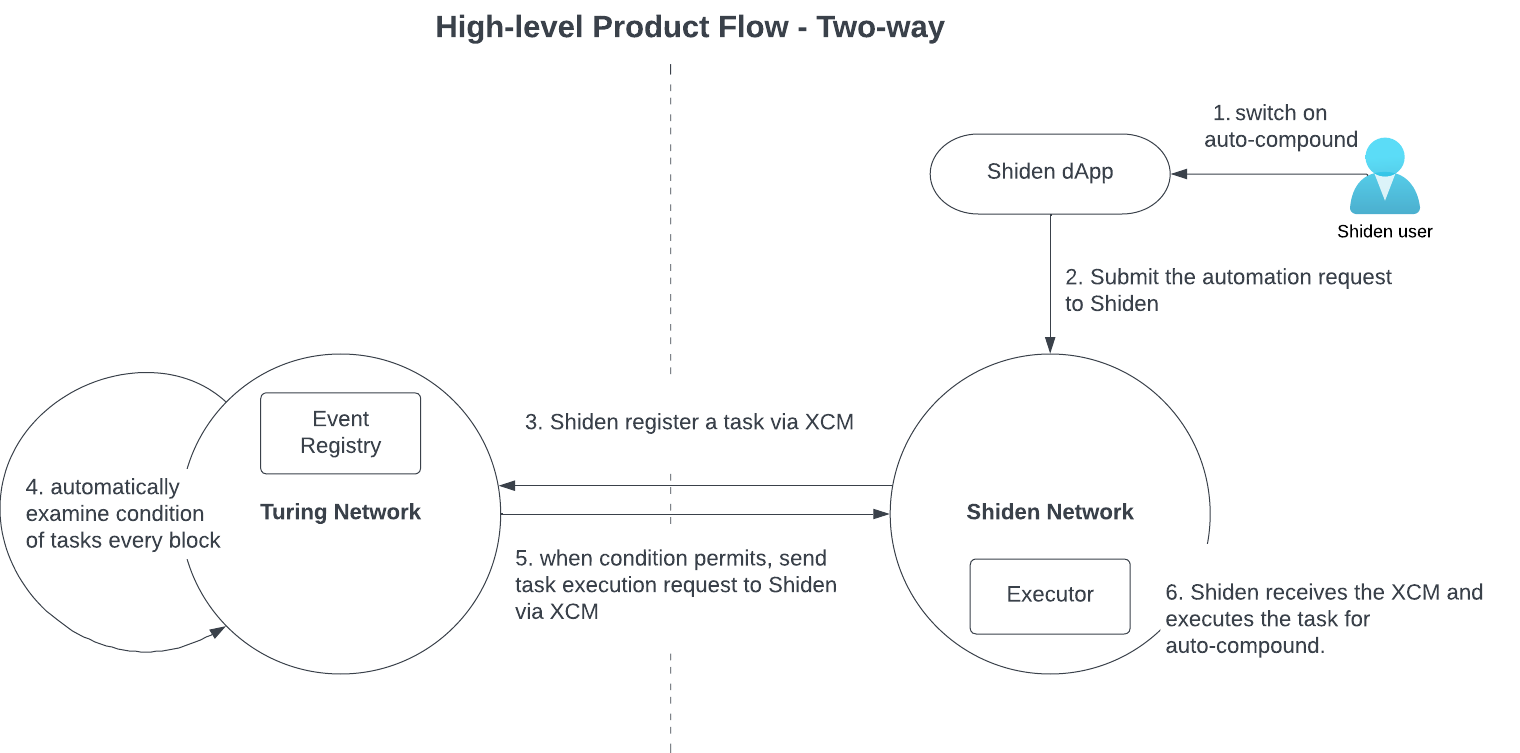
1.2 Picture the flow
After going through design decision calls, we will draw a high-level flow chart to picture the integration flow. For example, below is a diagram of a two-way XCM product integration.
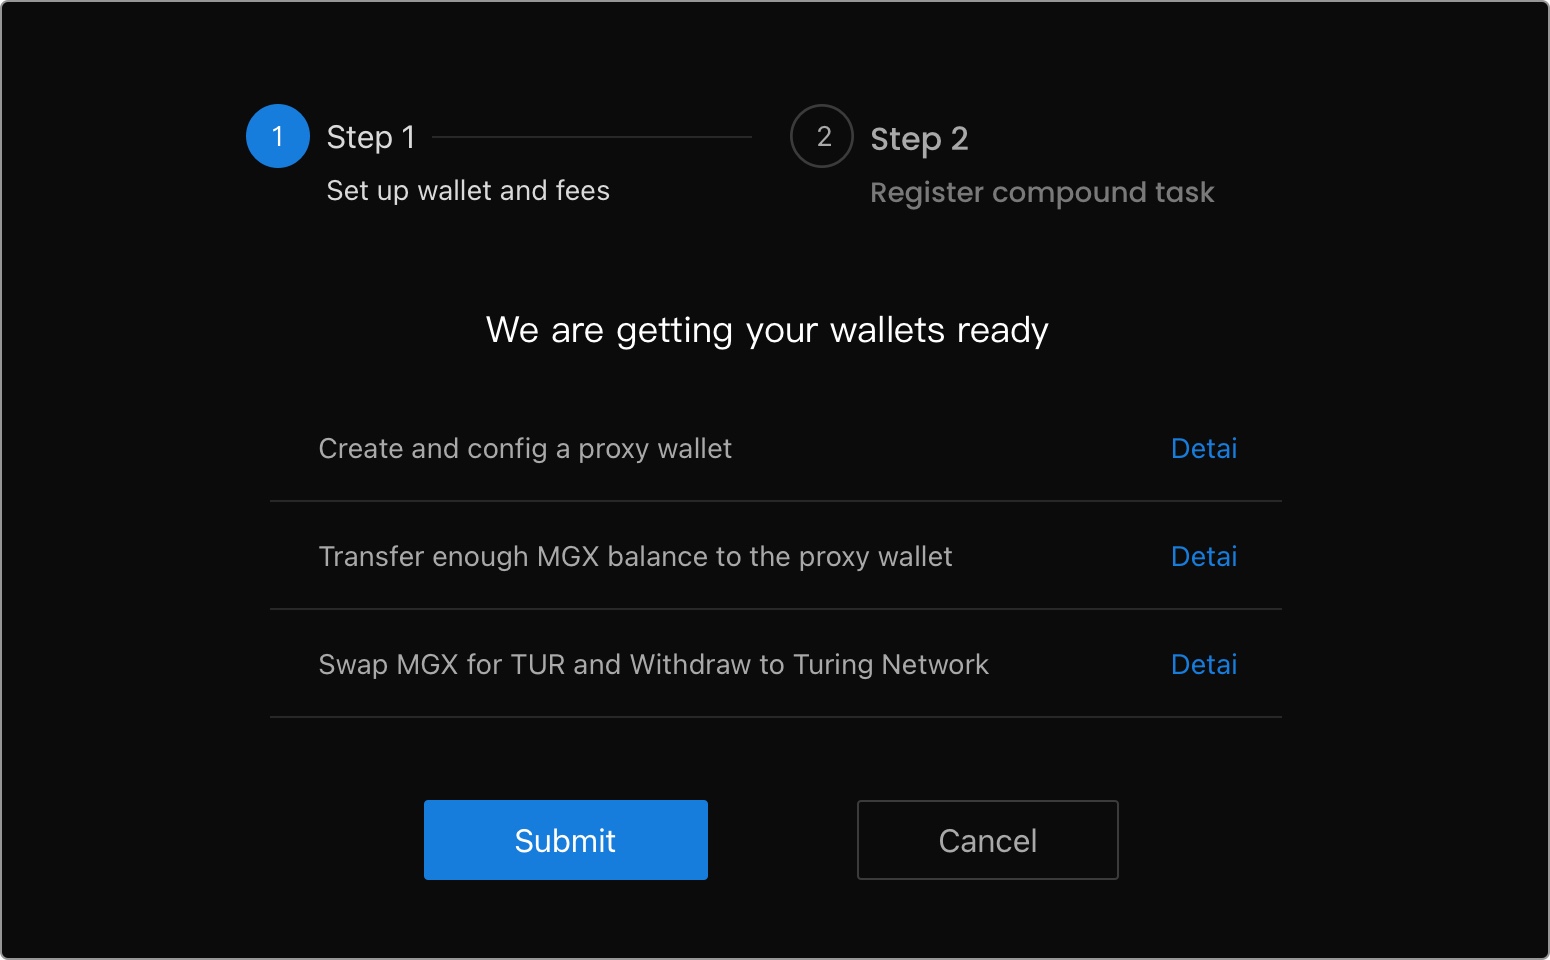
1.3 UI/UX Design
We will also provide partners with product mockups as recommendation, and to mimic the end user experience as a guideline. For example, below are our mockups for Mangata LP reward auto-compound.
-
After user turns on compound checkbox, navigate to Step 1, a one-time setup for user’s wallet, and ask to sign.
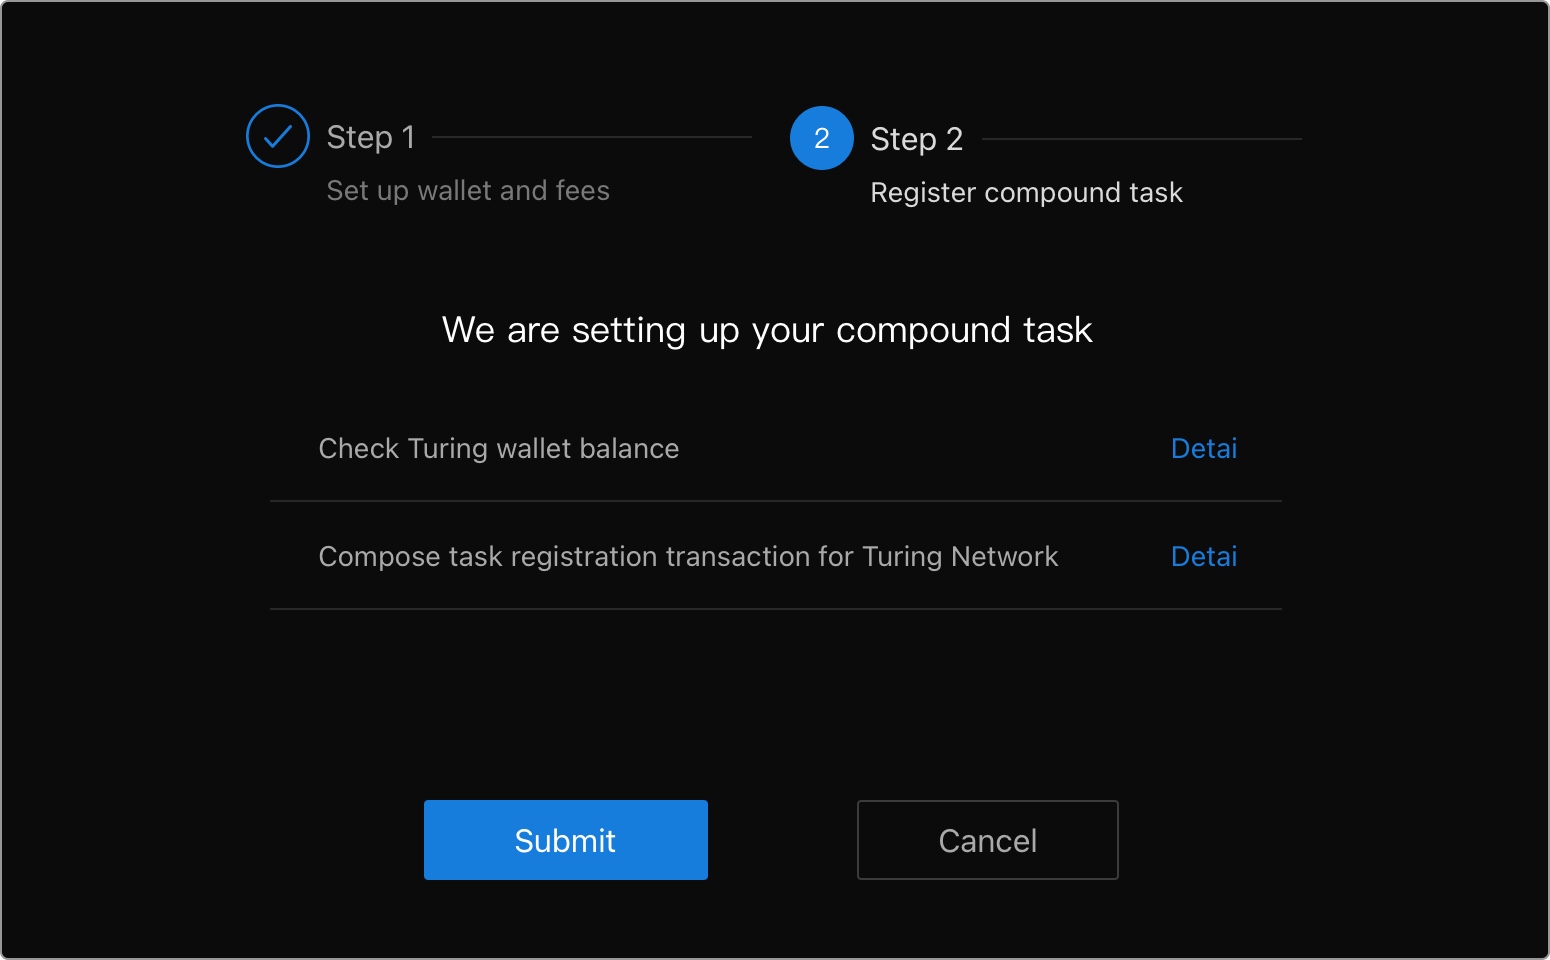
-
After signing, move on to Step 2 in order to set up automation on Turing Network.
2. Define XCM Message
We will go over the details of the XCM message design in the XCM Message document, but here’s a template that our automation uses to send the task function call over for the target chain to execute.
let target_xcm =
Xcm(vec![
        ReserveAssetDeposited::<()>(local_asset.clone().into()),
        BuyExecution::<()> { fees: local_asset, weight_limit: Limited(xcm_weight) },
        DescendOrigin::<()>(descend_location),
        Transact::<()> {
            origin_type: OriginKind::SovereignAccount,
            require_weight_at_most: transact_encoded_call_weight,
            call: transact_encoded_call.into(),
        },
        RefundSurplus::<()>,
        DepositAsset::<()> {
            assets: Wild(All),
            max_assets: 1,
            beneficiary: MultiLocation {
                parents: 1,
                interior: X1(Parachain(T::SelfParaId::get().into())),
            },
        },
    ]);
3. Define the fees
Fees are a big part of the product development, because there are several fees involved in the flow. If not implemented 100% accurately, small errors can accrue into bigger problems, such as insufficient balance for automation fees, or under-utilized residual balances.
3.1 Automation fees on Turing Network
First, there are two types of schedules defined in executionTimes of automationTime.scheduleXcmpTask
A. “Fixed” scheduling. User defines the number of occurrence and particular timestamps of a task. Three kind of fees need to paid on the scheduling.
- Inclusion fee - to include the task in Turing’s registry; charged at the scheduleXcmpTask call.
- Execution fee - to execute a task when time is right; also charged at the scheduleXcmpTask call. For example, if a user schedules a task to trigger 30 times, he would pay for the 30 execution fee upfront. (P.S. Refund is not implemented yet)
- Xcm fee - included in the execution fee. The Xcm fee is used to pay fees to the target chain when executing cross chain messages.
B. “Recurring” scheduling. This is the “good till cancel” option. The 3 fees are still there but the way in which they are charged are different.
- Inclusion fee is the same as that of “Fixed”.
- Execution fee - only one execution is charged at the scheduleXcmpTask call, and at the end of every execution, the next task will be scheduled and fee needs to be paid. It keeps going on till a user calls to cancel the task.
- Xcm fee is the same as that of “Fixed”.
3.2 Execution fee on the target chain
Since the execution of the task happens on the target chain, the partner needs to finalize the calculation method and send it off to Turing for implementation. Since we have done it repeatedly, we can help partners to determine their fee calculation.
4. Testing Procedure
4.1 Local Testing
The first step is for developers to spin up a relay chain and two parachain chains locally, build the bridge and test the integration.
-
Build and run: Relay chain
The goal is to run a local Rococo in this step, so clone the source code from the Polkadot repo.
-
Build and run Turing
Clone the source code from OAK-blockchain
- Build and run the target chain
-
Run zombienet for local chains and HRMP channels
The zombienet built by Parity can help us quickly spin up a relay chain, and two parachain networks and build channels. We recommend it for a quick-start.
Follow the zombienet demo in our Github repo.
- Make sure XCM acknowledge and execution logic are implemented on the target chain.
- Run testing functions. For example, we wrote a Javascript e2e testing code for Mangata integration.
4.2 Testing on Rococo
The second step is to deploy both releases to Rococo parachains, build the bridge and test the integration.
- Release a new build and deploy it to Rococo parachains.
- Make sure assets involved are registered on both chains
- Establish HRMP channel between the two parachains.
- Run E2E testing
4.3 Testing on Kusama
In this final step of testing, we will follow below steps for deployment as well as end-to-end testing.
- Deploy the same build to Kusama parachain
- Make sure assets involved are registered on both chains
- Establish HRMP channel between the two parachains.
- Run E2E or manual testing